Ingredients
Servings:
4
Ingredients
- 24 cmDough ingredients
- 80 gbutter
- 70 gpowdered sugar
- 125 gEGG yolk XL (3 yolks)
- 150 gEGG WHITE XL (4 whites)
- 80 g70% couverture chocolate
- 70 gwhite sugar
- 80 gweak flour (or pastry flour)
- 3 gleavening agent
Nutritional Information
Per Serving (Approx.)
Calories
1497 kcal
Protein
90 g
Fat
96 g
Carbohydrates
70 g
Disclaimer: These values are estimates based on ingredient types and may not be precise.
Step-by-step Guide
Preparation

- Line the base of the mold with baking paper. Butter the base and sides of the mold, then lightly flour them to prevent the batter from sticking.
- Place the prepared mold in the refrigerator until it is ready to be filled with the batter.
- Preheat the oven to 180ºC, ensuring it is thoroughly hot at least 30 minutes before baking.
- Melt the chocolate in a double boiler, stirring occasionally until it is completely melted and smooth.
- In a bowl, place the room temperature butter, which should be softened, and the confectioners' sugar. Mix well with a whisk until you achieve a creamy and homogeneous texture.
- Separate the egg yolks from the egg whites, ensuring there is no trace of yolk in the whites, and set aside each part separately.
- Add the yolks to the butter mixture one by one, stirring constantly with the whisk. Make sure each yolk is well incorporated before adding the next.
- Incorporate the melted chocolate into the bowl with the butter and yolks, stirring with the whisk until achieving a smooth and glossy cream.
- Transfer the mixture to a large bowl and set it aside for later.
- In another container, beat the egg whites at medium speed until they start to foam. Gradually add the sugar to achieve a meringue with peaks that hold their shape, but without being overly stiff.
- Add 1/4 of the meringue to the chocolate bowl and stir vigorously to integrate well.
- Reserve the remaining 3/4 of the meringue for later.
- Incorporate the sifted flour and baking powder into the chocolate bowl, stirring gently with the help of a spatula.
- Once all the flour is incorporated, add the reserved 3/4 of the meringue. Do this patiently, stirring gently with a spatula from bottom to top (and from the center to the edges) while rotating the bowl. It is important not to lose the incorporated air.
- Bake the cake at 180ºC for about 30-35 minutes. After 30 minutes, begin checking the doneness by inserting a wooden skewer into the center of the cake to see if it comes out dry.
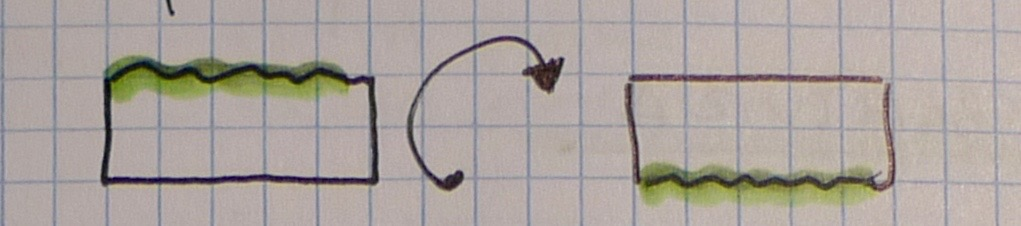
- Allow the cake to cool before unmolding it. Note: You can let it cool upside down with the base of the mold on top to try to make the top surface of the cake flatter and more level, but it's not a problem if you don't do this. If it becomes slightly deformed, it can be fixed once it's cool.
- Once cool, unmold the cake and place it in the refrigerator until it's thoroughly chilled or until the next day. The next day, slice the cake and ensure you have regular surfaces.
- Once cool, you can cut the cake. It's important that the top and bottom surfaces are as flat and regular as possible.
- 1st option: If the top surface is relatively flat, turn the cake so that the base becomes the top and the top becomes the base.
- 2nd option: If the top surface is very uneven, shave off a layer to level it. To cut the layer, it's helpful to first mark a groove around the cake with a knife at the point where you want to make the cut.
- Next, using a fishing line or 3 or 4 strands of sewing thread twisted together to make it more durable and with a length to wrap around the cake, pass it along the channel, tying it into a loop that closes upon itself when pulled from the ends. Pull it tight, and the cake will slice evenly.
- Use the same method with the channel and thread loop to slice the cake in half.
- In any case, the base of the cake will become the TOP Side because it is the smoothest, and the top side, once adjusted, will become the base of the cake.
Prepare the Syrup to Soak the Cake
- Bring the powdered sugar and water to a boil over medium-high heat, stirring occasionally, until the liquid comes to a full boil and the sugar is completely dissolved. This usually takes about 5 minutes.
- Remove from heat and let cool for about 15 minutes. Once cooled, add the apricot jam and mix well until smooth.
- Using a silicone brush, generously paint the interior surfaces and sides of the cake with the prepared syrup, ensuring it is well covered.
- Let the cake rest for approximately 2 hours at room temperature to allow the syrup to soak in well before adding the jam filling.
Stuff with Jam
- With a knife, gently score a grid on the surface of the half of the tart that is to be filled, being careful not to cut all the way through.
- Apply a generous layer of jam on top, following the grid, and spread it evenly with a spatula until it covers the entire surface.
- Cover the cake with the other half, pressing lightly to prevent the jam from oozing out the sides, and ensure all the edges are well sealed.
First Layer
- Bring the cream to a boil in a saucepan over medium heat, stirring occasionally until it reaches a boil.
- Remove the saucepan from the heat and add the chopped chocolate. Stir gently until it completely melts and forms a smooth mixture.
- Add the butter to the chocolate mixture and stir until fully incorporated and shiny.
- Place the cake on the base of the mold for convenient handling. Note: We should place the smooth outer side (the one without the rim) facing up to facilitate the removal of the cake.
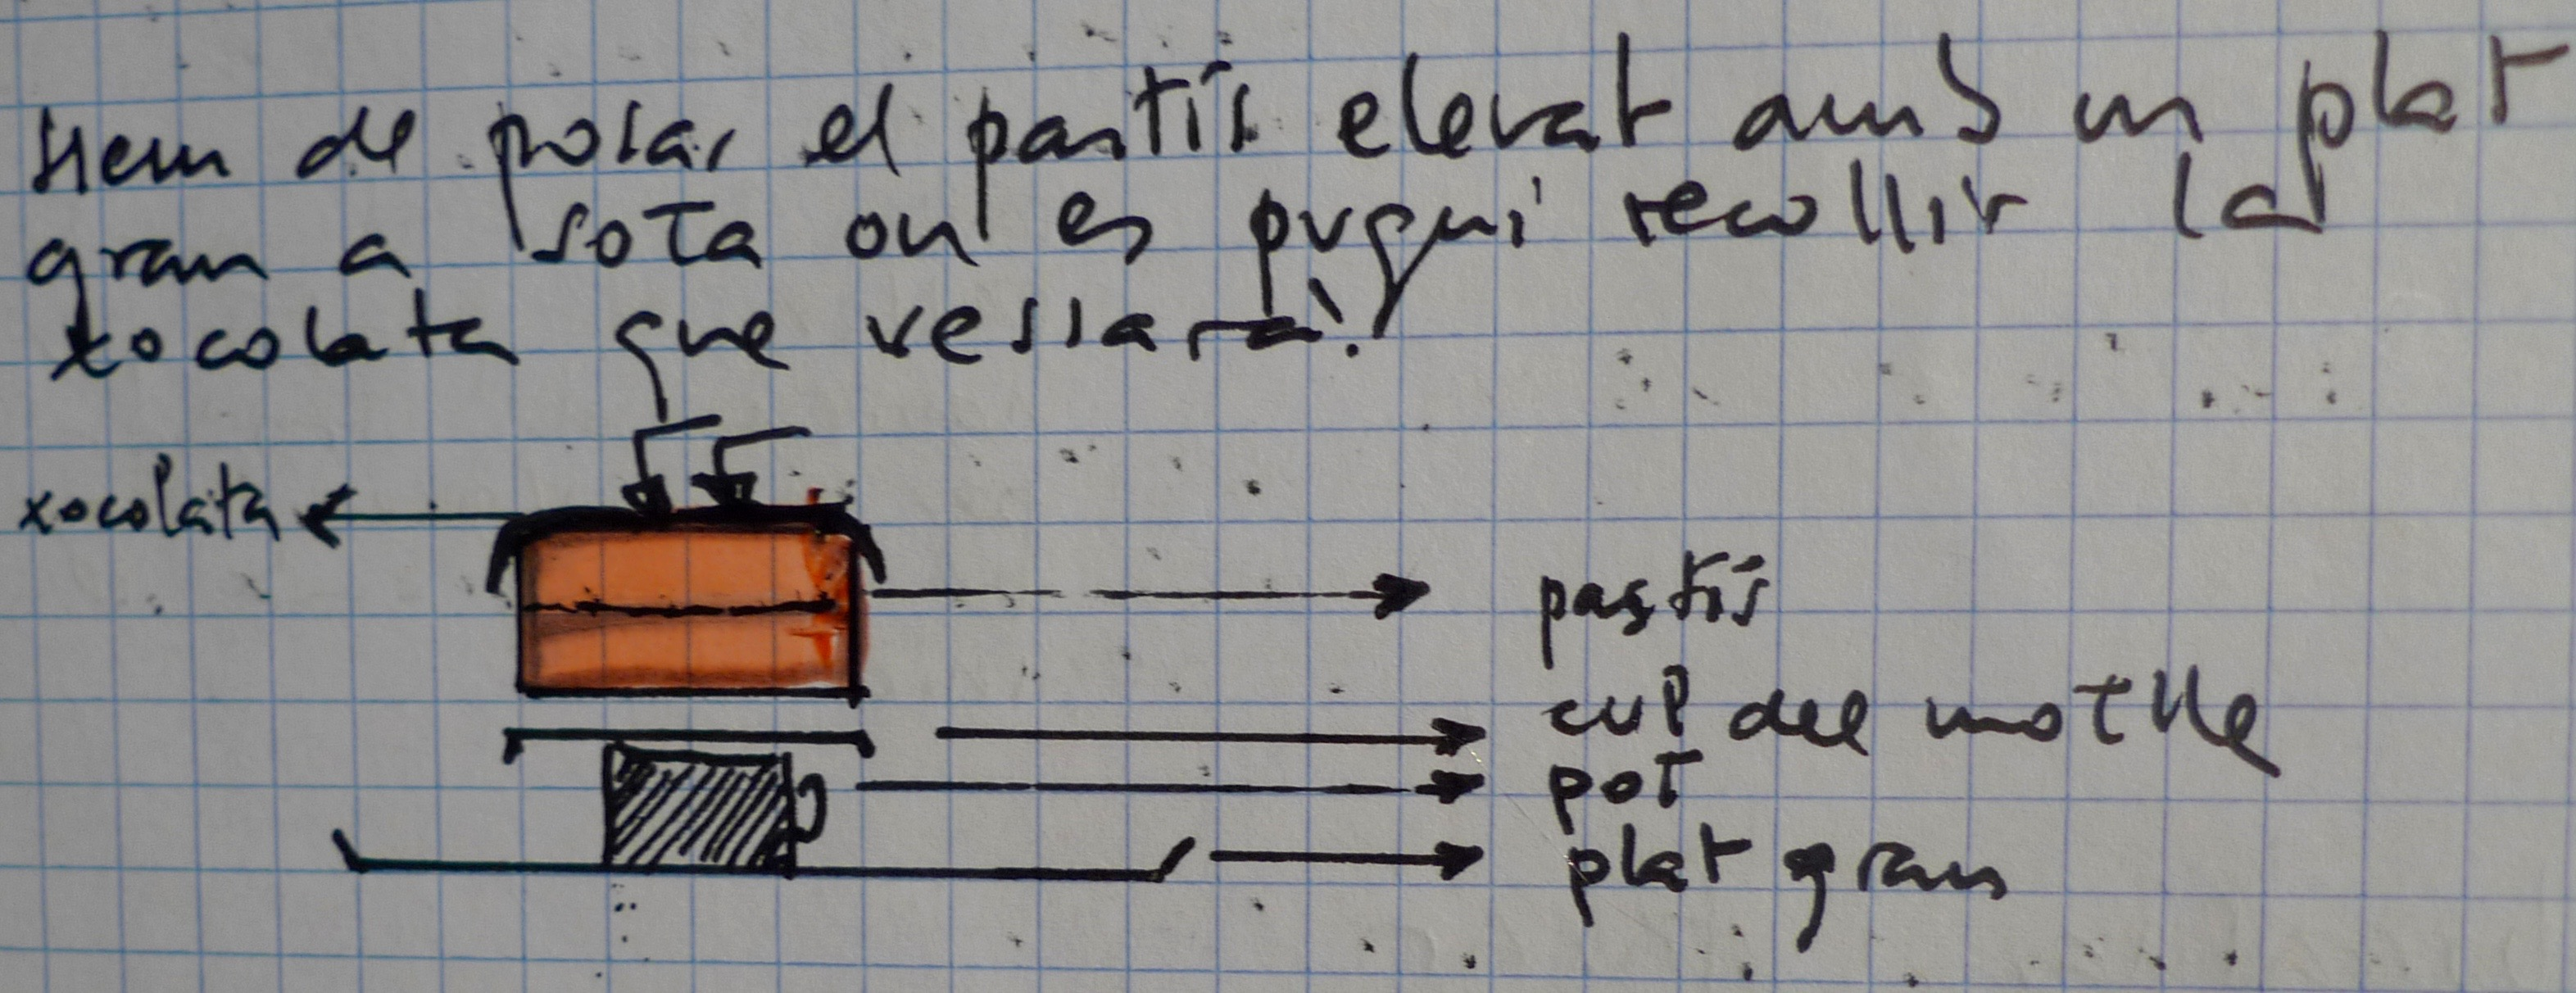
- Place the cake on top of a can and position a large plate underneath to catch any dripping chocolate.
- Translate this steps to English. Keep the same format and structure:
- Let the chocolate coating cool until it reaches a temperature of 41ºC, stirring occasionally to prevent a hard layer from forming.
- When the coating reaches 41ºC, pour it over the cake starting from the center and moving towards the edges, ensuring an even cover.
- Level the coating with a long spatula or a long knife, making gentle movements to achieve a smooth surface.
Final Glossy Glazing
- Place the cake in the refrigerator for at least 2 hours to ensure the coating cools and solidifies completely.
- Soak the gelatin sheets in very cold water for at least 10 minutes before starting to prepare the glaze, ensuring they are completely submerged.
- Heat the heavy cream, water, and sugar in a tall pot over medium heat, stirring occasionally until it begins to simmer gently.
- Add the cocoa powder to the simmering mixture and cook until reaching 103ºC (63 Brix), stirring continuously with a whisk for approximately 10 minutes to prevent sticking to the pot.
- Transfer the mixture to a glass bowl and let it cool until it reaches 60ºC, stirring occasionally to speed up the cooling process.
- When the mixture temperature drops to 60ºC, add the well-drained, hydrated gelatin, stirring with a manual whisk until fully dissolved and integrated.
Do not Beat Air
- Homogenize the chocolate: Place the immersion blender turned off inside the chocolate saucepan so that the blades touch the bottom. Turn on the blender and, Without Lifting IT from the bottom, gently move it through the chocolate for a few seconds to avoid incorporating air. Turn off the blender before removing it from the chocolate.
- Gently stir the chocolate using a manual spatula, making very slow movements to remove any air bubbles without incorporating more.
- Let it cool until it reaches a temperature of 30-31ºC. This may take a few minutes depending on the environment, but make sure to measure with a kitchen thermometer for accuracy.
- Pour the chocolate over the cake, starting from the center and moving towards the edges evenly. Ensure the cake is well chilled to guarantee the coating sets correctly.
Recommendations & Tricks
- For enhanced flavor, prepare the tart the day before and let it rest overnight; this will allow the flavors to settle and improve.
- For the topping, wait until the next day to apply it, as this will prevent the tart's moisture from affecting it.
- Make sure to use a 24 cm diameter mold to ensure the tart has a uniform height.
- When creaming the butter with the powdered sugar, do so until the mixture is pale and fluffy to achieve a lighter batter.
- Use XL egg yolks and whites to ensure the correct ratio: 3 yolks and 4 whites for adequate consistency.
- Melt the couverture chocolate in a bain-marie to prevent it from burning, and make sure it's at room temperature before adding it to the batter.
- Sift the cake flour and baking powder before incorporating them into the batter to prevent lumps from forming.
- Whip the egg whites to stiff peaks before adding them to the batter, as this will add volume and lightness to the tart.